Field report apps are essential for keeping projects on track, but many existing solutions are overly complicated or lack the flexibility you need.
The good news is that you don’t have to be a developer to create a field report app that meets your exact specifications.
With no-code platforms, you can build a custom app with ease — no technical skills required. Let’s explore how to make this happen.

A Field Report App: What It Is, and How to Build One
Field report apps provide a checklist of tasks to be executed or specific workflows. Folks will use the app to show that they’ve completed these tasks and workflows — they can even provide “proof of work” by uploading photos, documents, signatures, or anything else that confirms a job is done.
In most cases, field report apps will serve as internal business tools used by your team and cater to your business's intricacies. The beauty of creating your field report app is that you can customize it to the uniquely specific needs of your industry, business, or services.
You can apply field report apps to a variety of use cases, including the following:
- Construction field report apps
- Field service report apps for electricians, plumbers, contractors, and more
- Architect field reports apps
- Inspection report apps
- And more
Let’s plan out your app before we jump into the building guide. Here are 3 things you’ll need before creating your field report app:
- A list of your workflows, tasks, and needed features: Jot down all the tasks and workflows each job entails. It goes without saying, but you’ll need to create screens that list all the tasks and workflow elements.
If you need to provide photos for proof of work, a camera feature or a functionality that allows you to upload photos is essential. Think of other features like a signature function, PDF reader, payment integration, and more.
- Wireframes (digital blueprints): Just like an architect planning a new project, you’ll need to create your app’s blueprints. We recommend wireframing, which allows you to create your app blueprints using a software program.
Figma, a design software company, offers a fantastic free wireframing tool. Use it to create a blueprint for how each screen will appear. This will help ensure your building process goes smoothly.
- A membership with Adalo: Using Adalo, one of the best no-code native mobile app builders available, you’ll be able to breathe life into almost any field app idea. But don’t worry — Adalo doesn’t sacrifice power for simplicity, so you won’t need any technical or coding knowledge to use it.
Adalo features a super-simple drag-and-drop interface that works a lot like PowerPoint. You’ll start with a template (we’ll discuss this in more detail in Step 1) and customize it to your exact needs.
When you build with Adalo, you can add and delete screens, buttons, pictures, and more. After you finish building, you’ll have a professional-looking app that properly reflects your brand.
App Anatomy and Physiology: The Parts of Any App
Before we jump into building, let’s talk about the specific parts of all apps. Adalo comes pre-packaged with each of these parts, allowing you to build and customize each one to your unique tastes. Here are the 3 parts all apps have in common:
- Your App’s Frontend: This is the part of your app your team will work with. They’ll use it to create and submit field reports. The frontend’s parts include all your screens, buttons, lists, and more.
- Your App’s Backend: Also known as your app’s brain, the backend works behind the scenes, pulling up info from your database, sending and receiving reports, connecting with functions like a signature or camera feature, and more.
- Your App’s Database: Although it's part of your backend, it gets its shoutout because it has a unique function: It stores your app’s information, such as work completed, users, payments, and much more.
Now that you know the parts of your app, let’s get to building!
Step-by-Step Guide to Building Your Field Report App
Step 1: Download the App Template
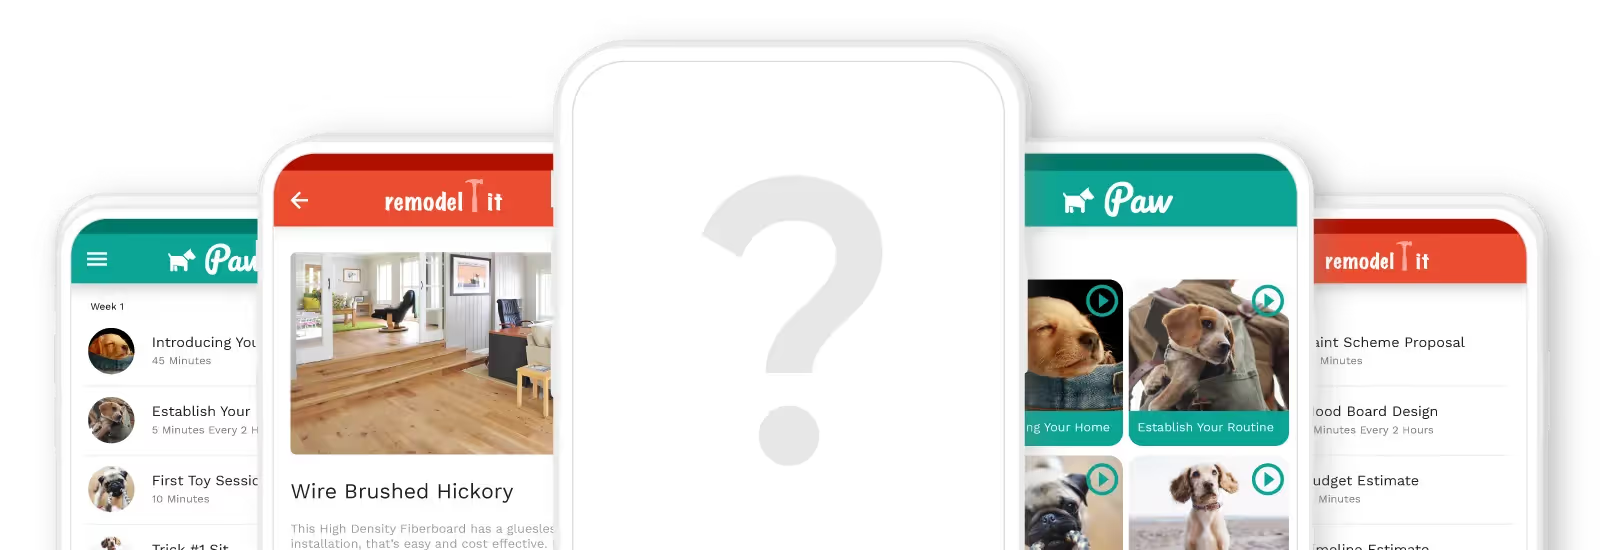
As we mentioned earlier, Adalo provides pre-made templates. Luckily, one will be a great foundation for creating your app: The Progress Bar Template. Originally built as a template for dog owners, it allows you to create customized checklists that can be transformed into workflows and tasks for your specific needs.
One cool feature of this template is that it displays your progress toward completing a task or workflow.
Step 2: Building and Customizing Your App
Let’s dive into the reason you consulted this guide, which is using a top-notch, no-code app-builder like Adalo to create your very own unique field report app. To do this, we’ll get you up to speed with Adalo’s app-building interface, made up of the following 3 elements:
- Horizontal Ribbon: This ribbon stretches across the top of your screen. It’s where you can access your Adalo account settings and preview your app.
- Adalo’s Building Canvas: This takes up most of your screen space and is where you’ll see all your app’s screens. You can edit them by repositioning text boxes, pictures, and elements using your cursor.
- The Editing Dashboard: Appearing like a gray bar that drops vertically, your Editing Dashboard has all the functionalities you need to create, edit, and customize your app.
How To Add and Delete Screens
To customize your field report app, you'll likely need to add or delete screens and modify their components. Follow these simple steps to manage your app's screens effectively:
- Add a New Screen: Select “Add Component/Add Screen” (the “+” in a colorful circle) at the top of your Editing Dashboard, then click “Add New Screen.” A new screen will appear on your Building Canvas.
- Customize Your Screen: Click the “Add Component/Add Screen” button again, choose the component you want (such as text boxes, lists, or buttons), and drag it to the desired location on your new screen.
- Delete a Screen: Click the “Screens” button on the Editing Dashboard (the icon looks like a computer screen), scroll to the screen you want to delete, click the three vertical dots button, and select “Delete.”
- Add More Components: Click the colorful “+” button, then scroll down to the “Adalo Marketplace” to browse and add components like a PDF uploader, QR scanner, signature tool, and more.
Step 3: Configuring Your Database
Adalo’s easy-to-configure, prepackaged database allows for easy setup. Here are the 3 parts of your database and how to organize each one:
1. Collections: Appearing like spreadsheets, all your data is stored in collections — essentially mini databases in which data groups are stored.
To change a collection’s name, click the “Database” button and select “Add Collection.” Name your collection, and you’re all set. Your template will already have 3 collections: Users, Lists, and Tasks.
2. Properties: After you create a collection, you can edit its properties, which are your data titles. Click each collection, and you’ll see all your properties. You can add new ones by selecting the “Add Property” button at the bottom.
3. Records: This is the actual data in your collection. Records arrive when users enter information into your app by filling out a form.
How To Connect Your Pre-Existing Database
If you’re a business owner, you most likely have your database. Don’t worry; you won’t have to manually enter all your data into Adalo’s premade collection. Adalo can integrate with external databases such as Google Sheets, Airtable, and Xano using custom APIs. You will need to configure the API settings within Adalo for successful integration.
To connect your database, scroll down to the “Add External Collection” option from the Database button and follow the instructions. Your database will be ready in no time.
Step 4: How To Preview Your Field Report App
After you build out a few parts of your app, you’ll probably want to use Adalo’s previewing function to see how it looks and feels. Click the green “Preview App” button from your Horizontal ribbon and scroll down to “Staging Preview.” You’ll then be able to click through your app.
If you encounter any problems, note them and get them fixed immediately. Doing this will save you time in the long run.
Step 5: Integrating Payments to Your Field Report App
If you need to take payments, Adalo integrates with Stripe. To set this up, go to the Stripe registration page and create an account.
Return to the Editing Dashboard, select the colorful “+” button, and find the Stripe form. Simply drag it to your payment screen, follow the Adalo setup directions, and you’ll be ready.
Step 6: Publishing on the Web and in the App Stores
Once you’ve finished building, it’s time to publish your app — to the web, the Apple App Store, and the Google Play Store. Because the publishing process is super simple, we’ll start by walking you through publishing your app to the web.
How To Publish Your App to the Web
Publishing your app to the web allows your team members to access it directly from their browsers. Follow these steps to make your app live and accessible:
- Access the settings: In the Horizontal Ribbon, select the Profile button, and then scroll over to “Settings.”
- Enter your domain: Click the “Domains” tab and enter your domain (e.g., www.MYSPECIALDOMAIN.com). If you don’t have a domain, you can purchase one from providers like GoDaddy.
- Publish your app: Return to the Editing Dashboard and click the “Publish” button (an icon shaped like two checks). Follow the on-screen instructions to make your app live on Google.
Note: The app won’t have features like GPS or direct camera integration when published as a web app.
- Create a progressive web app (PWA): To make your app downloadable on mobile devices, select the “View App” button and click “Share Your App.”
- Share the app with your team: Text or email each team member a link to download your app so they can easily access it on their phones.
Preparing To Publish Your App to the App Stores
You're in luck if you want to create a niche field report app to market to businesses on the app stores. With Adalo, you can publish your field report app on the Apple App Store and Google Play Store.
However, it takes a few more steps than publishing on the web or creating a PWA.
Here are the preliminary steps you’ll need to follow:
- Do your research and write a description: Enter in a quick app-store search for “field report apps” or “(your niche) report apps.” Browse their descriptions and take notes of the keywords.
When you write your description, use their keywords and weave in some keywords of your own. For instance, if you’re making a field report app for plumbers, include keywords like “plumber field report app” and “app for plumbers.”
This way, you increase your chances of being more visible in the search engine results pages.
- Build a beautiful app icon: Because your icon will appear right next to your app’s title in the search results, folks will most likely associate it with your app. So, make sure it’s good.
You needn’t be a tenured graphic designer to produce a killer icon — create an account with Looka, an icon-design tool, and make a gorgeous app yourself.
- Only submit eye-catching screenshots and videos: To give potential users an idea of what your app offers, you’ll be able to provide a few screenshots and videos of functions. While it’s obvious, only provide shots and videos that portray your app in a professional light.
Screenshots that shoot nothing and poorly produced videos will stain your reputation.
Ok, let’s get to the app store publishing procedures.
Publishing to the Google Play Store
Create an Android developer account and pay your one-time fee of $25. Ensure you enroll with Google’s app-testing platform, which allows testers to download and try your app. When they finish, they’ll provide feedback.
Make any necessary changes, as their feedback can be a potential goldmine of help. Once your app is all dialed in, return to your Adalo account and select "Publish” on the Editing Dashboard. Then, after following the Android directions, your app should be good to go in no more than a few days.
Publishing Your App to the Apple App Store
Register with the iOS developer page and pay the yearly $99 fee. Sign up for TestFlight, Apple’s beta testing platform, after registering as an iOS developer. TestFlight allows you to distribute your app to beta testers and gather feedback before the final submission to the App Store.
Return to Adalo, click the “Publish” button, and follow the Apple publishing instructions.
Apple's app approval process typically takes a few days to a week, but it can take longer depending on the complexity of the app and the current review queue. Most apps are reviewed within 24 to 48 hours, but the process could take longer in some cases.
Next Steps: The Name of the Game Is Maintaining
Now, your role switches from app builder to app maintainer: You must vigilantly ensure the app runs smoothly without crashing, glitches, or bugs. If you do have problems, get them fixed immediately — a poorly performing field report app can seriously hinder your operations.
If you’ve made a field report app you want to market to companies, you’ll need to indulge in some marketing efforts. We wrote an app-marketing promo guide to set you off in the right direction. And, if you’re looking to monetize your app, check out our article about in-app purchases.
Adalo’s Editing Dashboard has an Analytics function that shows you the number of people using your app, their locations, and the most popular screens. Check this daily to see how much traction your app is getting and its most popular features.
Ultimately, having a field report app can seriously bolster your operations, and Adalo provides a perfect no-code platform for building one.


