Looking for a quick and easy way to build a database? Airtable offers four ways to get started, including using templates, AI, or uploading your data.
Read on to learn:
- Airtable basics
- How to get started with your project
- Tips for organizing data and automating tasks
- Managing your data with Airtable’s views
- Collaborating with your team
Now, let’s discuss Airtable and how it can help your operations.
What is Airtable, and How Can It Help You?
Airtable is a no-code database builder that allows you to organize and visualize your data. You can then automate data entry to build workflows, create and execute project management and CRM tasks, and more.
It’s one of the easiest database builders on the market: You won’t need to bring any programming or technical skills to create a powerful and professional database.
In addition to being a robust database builder, Airtable integrates with several app-building platforms, notably Adalo. This integration allows you to create a functional app from your Airtable database that you can publish on the web, in the Apple App Store, and in the Google Play Store.
Like Airtable, you won’t need coding or technical knowledge to build an app with Adalo.
Step 1: Sign Up for Airtable
Head over to Airtable’s signup page and create a free account. Airtable conveniently offers a free version, which gives you all the time you need to get a feel for its building interface before you strike the gavel about purchasing a paid plan.
Here are some of the perks that come with Airtable’s free version:
- You can build unlimited bases, which are essentially individual spreadsheets. Your total number of bases makes up your database as a whole.
- Share your bases with up to 5 different editors, which is a great perk if you intend to have multiple people work with your databases.
- You’ll get up to 1,000 records, which are rows, in each base.
- Attach up to 1GB of files per base.
- Run up to 100 data automations per month.
Once your account is running, let’s walk through how to build your first base.
Step 2: Create Your First Base (Database)
Airtable gives you 4 options for beginning your database creation, which you can see from the home screen:
- Start with AI: You’ll answer questions about your industry and the app types you aim to build. The AI will then refine its questions so your prompts accurately reflect the database you desire to assemble.
- Start with templates: Airtable has an extensive library with around 1,000 templates. Each template is a base with preloaded rows, views, automation, and much more. You can rejig and edit each one to your needs and tastes.
Here are a few popular templates:
- Project management is used to track work progress across your team.
- Sales CRM lets you organize each contact as they journey from lead to client in your sales funnel.
- Content Calendar to help teams publish and organize written, video, or any other kinds of content.
- Product Roadmap for those who need to visualize a product-release strategy and subsequently map out and track your product’s performance over time.
- Upload pre-existing spreadsheet/database: Want to convert another dataset into an Airtable database? No problem — Airtable allows you to import data from sources like Excel, Google Sheets, Smartsheet, Asana, and much more.
- Start from scratch: For all you creative types out there, you can start building your database from a blank template, tailoring it to your unique tastes or specific business requirements.
After creating your bases, you can invite collaborators to help you work on your database. As we mentioned, you can create as many bases as you wish — you can see and access them directly from your home screen.
Step 3: Add Fields and Organize Data
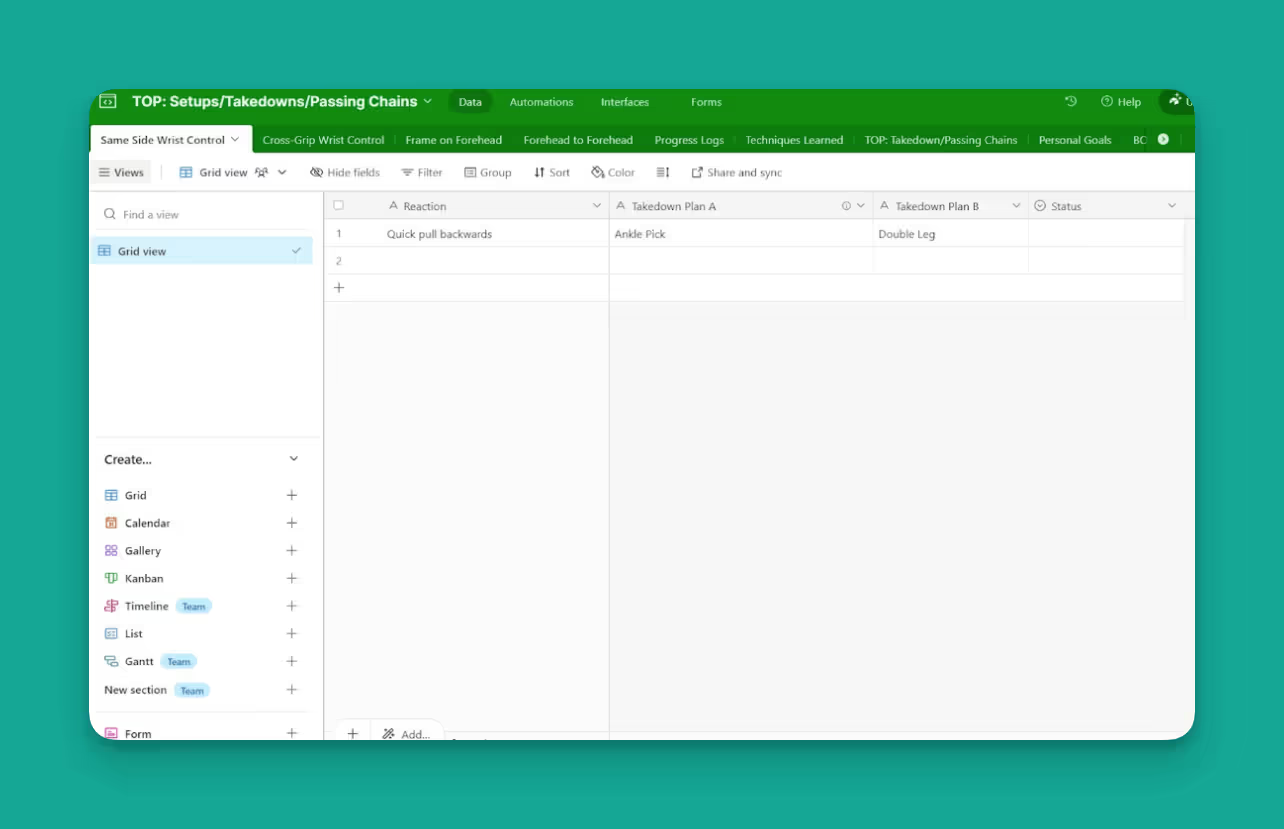
Open up your base, and you’ll see that it appears like a spreadsheet you’d see in Excel or Google Sheets. Each base allows you to create several different tables, which you can achieve by pressing the “+” button on the top right-hand side of your screen.

Each new table comes preloaded with four premade records: name, notes, assignee, and status. Double-click each record to change the title. Just like how you added new tables, you can add new records by clicking the “+” button on the far right side of your title row.
You’ll also notice a small icon inside each record-title box on the title’s left. These are fields that help you optimize and structure the data under each property in a unique way. For instance, each record type can be optimized to contain pictures, short and long text, formulas, and more.
For an extensive list and explanation of each field, check out Airtable’s useful documentation page.
Step 4: Import or Enter Data
If you’re like many businesses, you’ll most likely want to import data from pre-existing spreadsheets. Doing this is extremely simple — just follow these steps:
- Click the “Add or Import” button near the top of your screen, far left of your table's tab.
- You can select the “Add a Blank” table to copy and paste data manually into your Airtable base.
- To save time and import your data, select “Add data from other sources.” You’ll be able to connect to another Airtable base or transfer data from over 23 other third-party applications, including Google Sheets, Excel, Tableau Online, Workaday Reports, Salesforce, Zendesk, and more.
Are you using data from a third-party provider that’s not on the list? Airtable allows you to request an integration. They’ll let you know whenever that specific integration is available.
Step 5: Use Views To Manage Your Data
Airtable is more than a database builder — it’s a data visualizer. It provides Airtable Views, various methods for organizing, managing, interacting with, and viewing data in your tables.
The View function makes Airtable a relational database builder: A tool for creating several tables and viewing the data within them in different ways.
While it simplifies data visualization, it’s not a replacement for a proper front-end builder. This is because a frontend has more granular features, like a much more sophisticated user interface, the ability to submit data through forms, buttons that link to other web sources, and other functionalities.
Here is a brief explanation of the 7 types of Views you’ll get from Airtable:
- Grid View: Looking just like a spreadsheet, this is the default view in Airtable. It lets you see and edit records in rows and columns and is ideal for large datasets like inventory or contact lists.
- Calendar View: Your records are displayed as events on a calendar, allowing you to see dates and deadlines, which simplifies tracking schedules and timelines. Great for event planning, project management, or appointment/meeting scheduling.
- Kanban View: This board-style view lets you organize records into columns based on their status or category. You can seamlessly drag and drop cards between columns. It is ideal for projects that have multiple stages or moving parts (this is for you, software developers).
- Gallery View: See all your records as cards that display images, text, or other fields in a visually appealing layout. This method is good for organizing anything that relies on visual elements, like portfolios, product catalogs, and more.
- Form View: Create a form for data entry and fill out fields that correspond to record properties. Use cases include surveys, job applications, and other simple form submissions.
- Timeline View: A horizontal bar chart showing the records' duration over time, letting you visualize your project timelines and deadlines — an excellent choice for planning tasks in project management, human resources operations, and scheduling.
- Chart View: Use this to create visual data representations from selected fields, like bar charts, line graphs, pie charts, and more. Chart View is a solid go-to whenever you need to visualize complex numbers for presentations.
Step 6: Collaborate and Automate
Airtable is designed to meet the specific needs of various teams, so it provides collaboration features. These allow several team members to edit or build upon pre-existing bases. This feature appeals to any organization with multiple players working on the same project or projects.
Here’s the step-by-step way to ensure everyone’s on the same page when editing your database:
- Ensure your base is organized and ready for collaboration: Double-check all your tables and records to ensure all the needed information is present. Additionally, preview each base through the Views that your team will be using to catch any errors and confirm user-friendliness.
- Invite Team Members: In any base, find the “Share” button on the upper right-hand corner of your screen. Click the button, invite folks by email, or create a link and share it however you wish.
- Encourage commenting: Each user can comment about a base, which helps streamline communication and keeps everyone on the same page. Click on the vertical arrows next to each record in a cell and find the comment bar on the right side of the pop-up box.
- Track your changes: To do this, turn on your Revision History, which can be completed by clicking on the Base History button next to the Help Button on the upper right of your screen. With Revision History activated, you can see when and by whom changes were made.
Airtable’s automations make it stand out and save you time. Creating automations is a cakewalk — just press the “Automations” button at the top of your screen. You’ll then see a set of triggers, specific events, or conditions that initiate an automation when:
- A record matches conditions: If a record is marked “complete,” you can trigger the creation of a new record or send emails to all those involved in the project.
- A record is updated: After team members complete their work on a database, everyone will be automatically notified. You can also customize this automation to inform the next person in the workflow that they can begin their work.
- A set time or event occurs: You can periodically send notifications to team members. For example, send payday notifications to your team members on the second and last Friday of each month.
Ultimately, Airtable is designed for smooth collaboration between team members. The free version offers a generous suite of communication tools with 100 monthly automation runs — a count of one entire automation instance from start to finish.
However, Airtable’s paid versions, starting at $24/month per user, offer a much more robust package of features, with up to 50,000 monthly automation runs. For many users looking to leverage Airtable fully, a paid version might be necessary.
Next Steps: Turn Your Airtable Database Into an App
Want to build a sleek, professional, and highly functional app from your Airtable database? Check out Adalo.
Adalo is a simple no-code app builder that integrates with Airtable in just a few clicks. Delightfully, you won’t need technical or coding skills to build an app with Adalo.
Whether for CRM, project management, an internal account tool, or anything else, Adalo provides an easy platform to launch apps from your Airtable base. While it’s extremely easy, Adalo doesn’t sacrifice power: You’ll have nearly pixel-perfect design freedom, the ability to plug in 1,000s of third-party integrations, and much more.
After you build your Adalo app from your Airtable database, publish it on the Apple App or Google Play Store and the web. Adalo allows you to get your app in front of thousands of users.


